
Issue #: 147
Published: May / June 2016
- Price per issue - digital : 5.40€Digital magazine
- Price per issue - print : 6.20€Print magazine
- Access to Multihulls World digital archives Digital archives
Making a strong joint between the chain and the warp of your anchor rode is extremely simple: you have no reason not to adopt it!
Although the big multihulls favor ‘all chain’ to make life easier for the windlass, this means a lot of additional weight, more often than not forward of the mast, in the chain locker – which it’s true is less of an issue than at the bow of a monohull. Think about it: 50 meters of 8mm chain means 70kg forward of the coachroof! For a small boat, a mixed, chain/rope rode is obviously preferable, as it provides better elasticity than chain alone, especially if you don’t have a bridle...not to mention the price of rope per meter, compared with that for chain: less than 3 euros for 14mm, against 4.70 euros for 8mm chain. But you must take care with the joint. Using a simple knot is out of the question: it can come undone, it is prone to chafe and reduces the strength of the rope. An eye splice round a thimble combined with a shackle is very reliable, and preferable, but has one drawback: the thimble and shackle readily jam when passing through a narrow bow roller, which is often the case on small boats. And as for the rare windlasses which can work with rope, they don’t like swallowing shackles... This is where the chain/rope splice comes into its own. It ensures perfect continuity between the two elements. It rolls easily over the bow roller, slides over stainless wire, and doesn’t come undone! And what’s more, with the price of A4 stainless nowadays, it’s certainly the cheapest of all the joints.
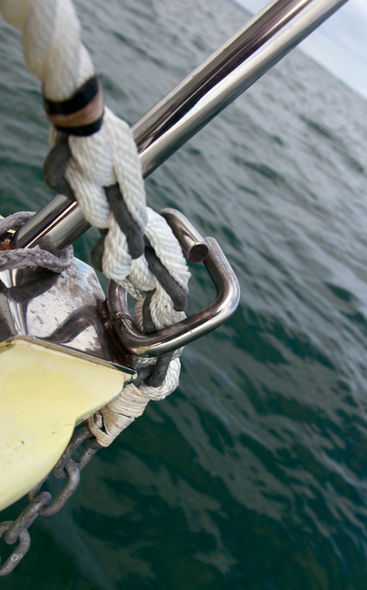
Thanks to this splicing method, you will no longer have to be at the bow to pass the thimble and shackle through the roller.
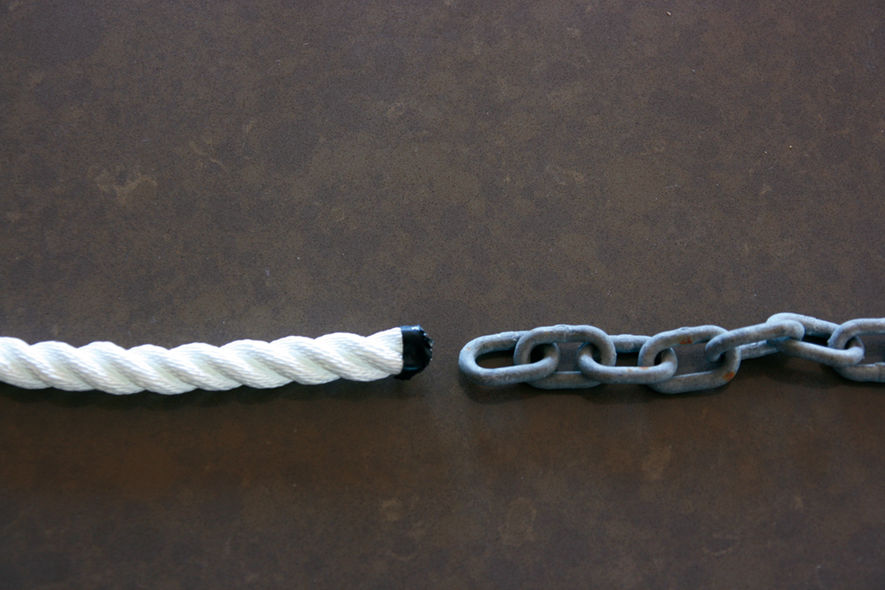
A good splice begins with a good pair of elements... This is not hard to establish: two strands of the rope must be able to pass through the same chain link. With 6mm chain, 10 to 14mm rope is perfectly suitable.
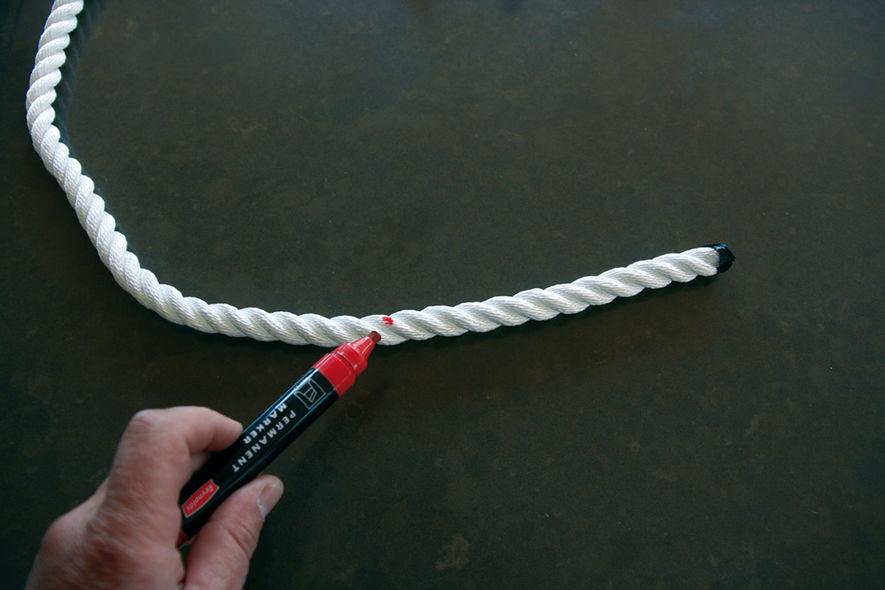
Count 12 strands from the end of the rope and make a mark with a felt tip pen or a piece of tape. This is the right length to ensure a splice which is both compact and not likely to slip.
Before unlaying the rope, tie it off with whipping twine and a needle. Stitch a pair of strands four or five times, then finish with turns and half hitches. The three strands are now held together and are immobilized.
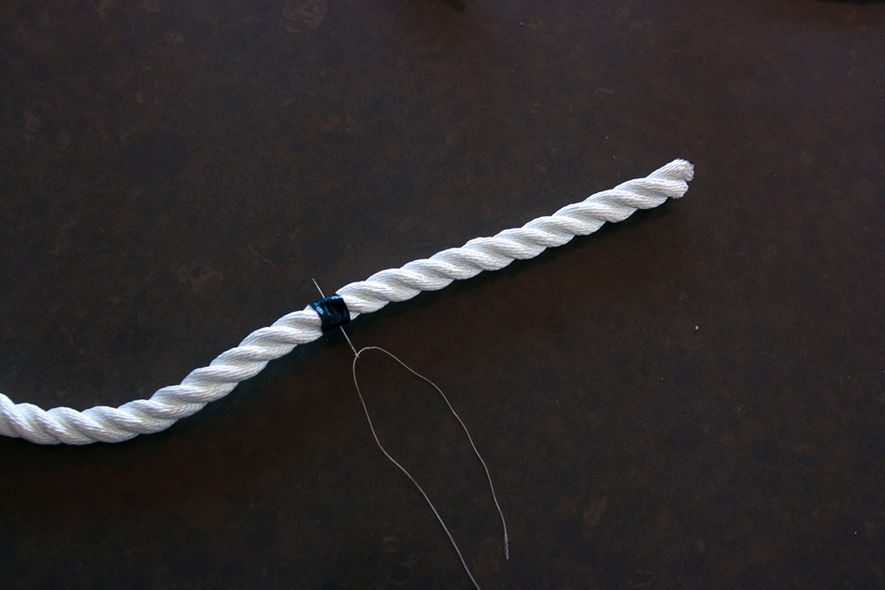
Each strand can be freed. And as all white strands look alike, identify them using a visual code. Here we are using adhesive tape.
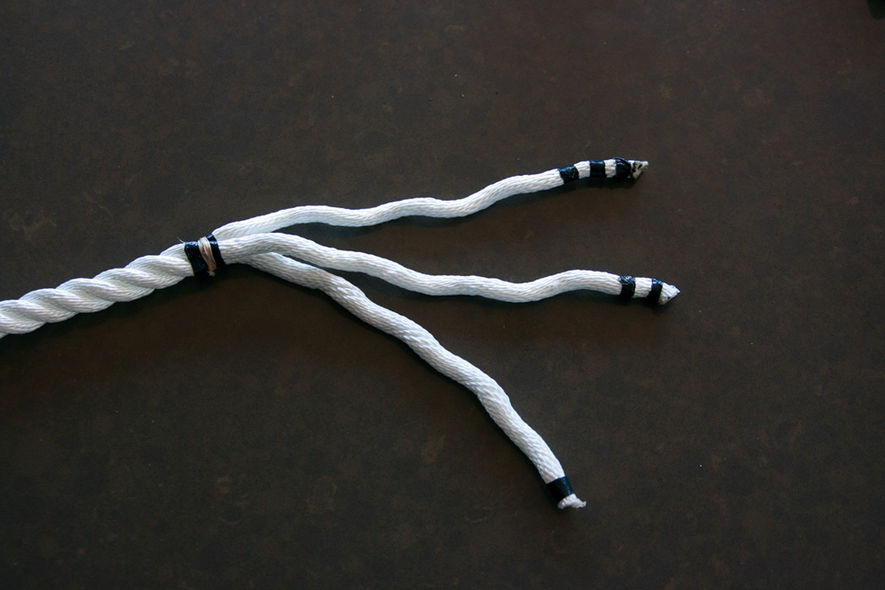
Here we go! The first strand passes through the first link of the chain. But not any-old-how: the idea is that the following strand arrives in the opposite direction, a principle maintained throughout the exercise.
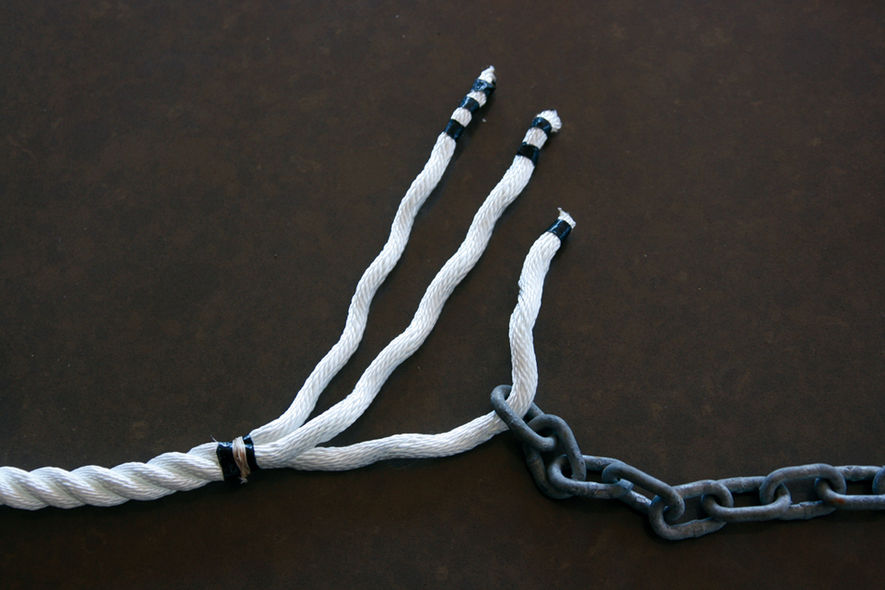
The second strand therefore also passes through the first link, crossing the first. End of the first tuck, pull tight firmly, keeping the chain in line.
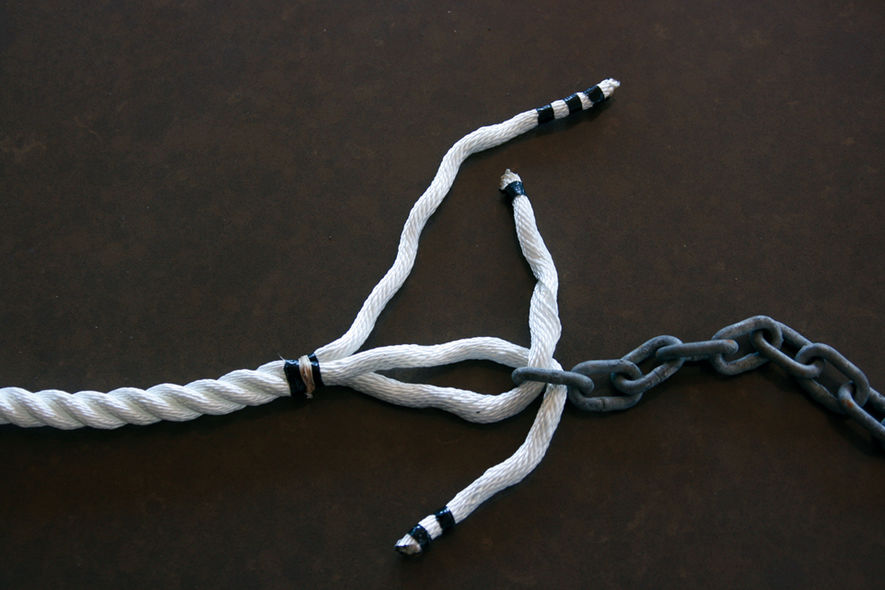
It’s now the turn of the third strand: this one goes through the second link of the chain. It is positioned so it will cross the first strand...when its turn comes.
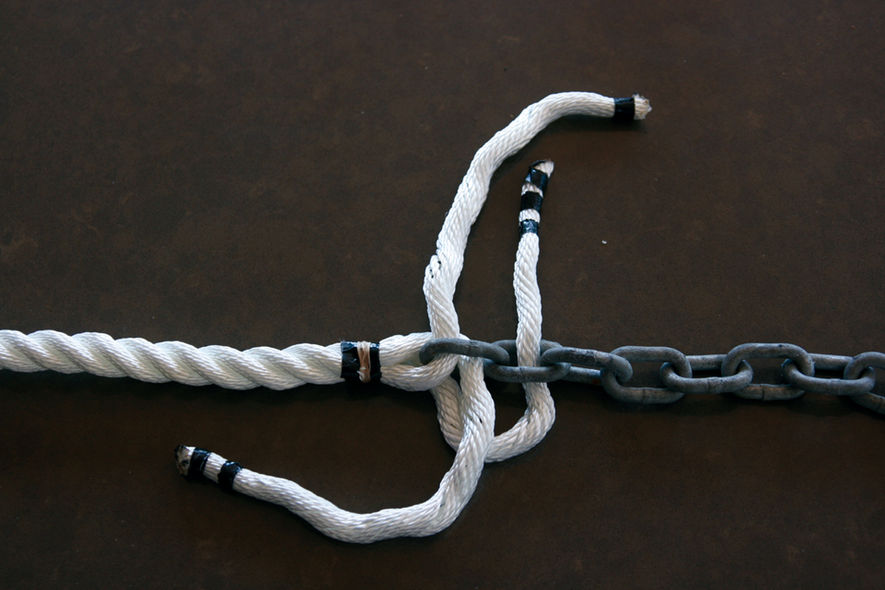
The first strand passes through the second link, in the opposite direction to the third strand. You have just completed the second ...
What readers think
Post a comment
No comments to show.